Back to Home

Samsara


Worked on 3 projects. A redesign of an existing project, a thermal investigation of a new product, and sustainable engineering research project.

Panic Button Redesign

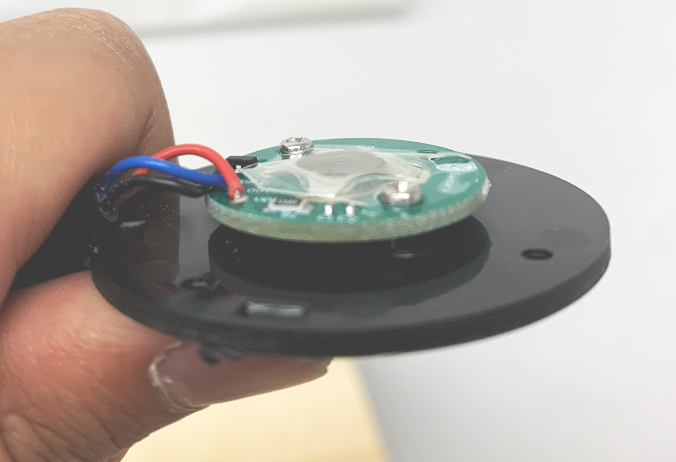
I was in charge of redesigning a product called the panic button. The panic button is a product that drivers can use to alert their fleet managers if they are hijacked. There were a few areas of improvement in the existing panic button that motivated the redesign. First, the tact switch inside the button was mounted with an adhesive tape, which was peeling in RMA units (shown in the image to the left). Second, consumers complained that the button clicking noise was too loud. Third, the button could benefit from a degree of dust/water ingress (e.g. to protect against a soda can spill). With these points of improvement in mind, I set off to design a slightly revamped solution.

Brainstorming

I did a good amount of brainstorming on paper to think of different ways to attack these problems. Along with the help of my manager, I ultimately decided it would be best to implement some sort of foam gasket into the product. The reason for this was the foam gasket could solve both the water and dust proofing problem and the noise issue simultaneously. My intuition told me the foam would help dampen any clicking noise from the tact switch. And while the foam wouldn't pass a vigorous IP rated test, it would provide enough resistance for what we needed at a reasonable price point.
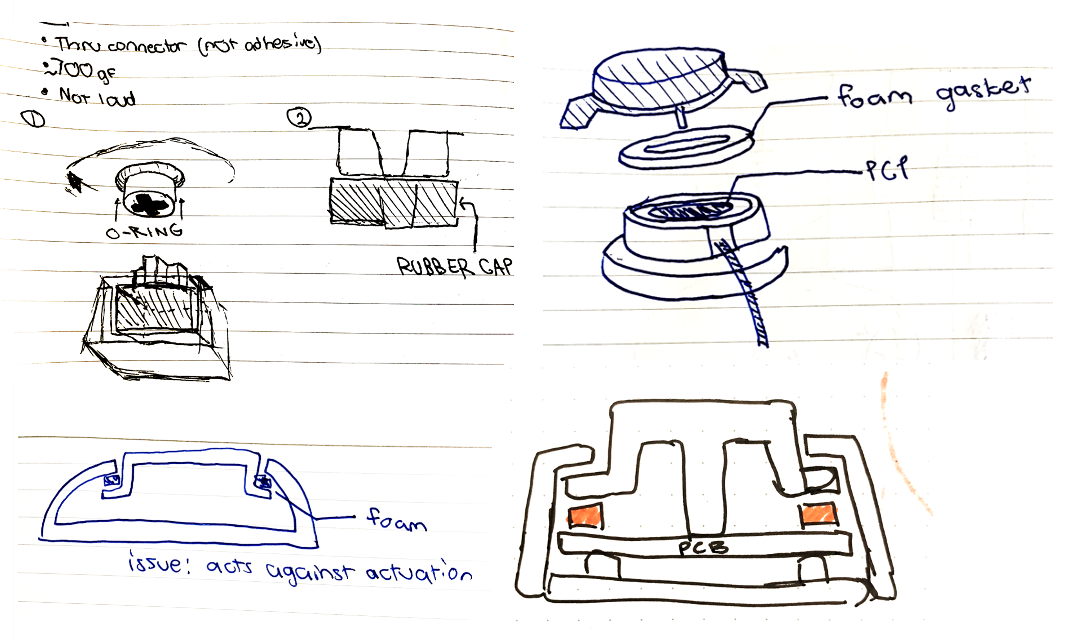
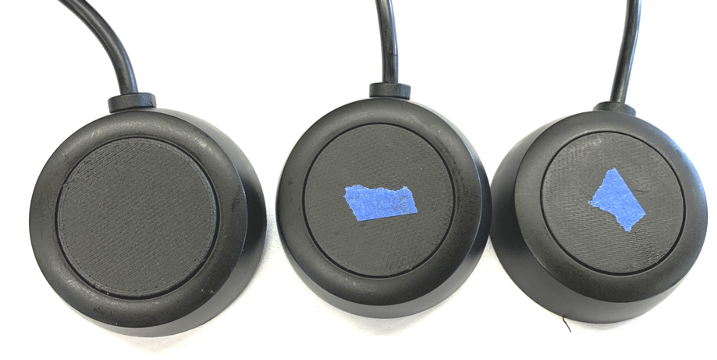
I concurrently scoured digikey for switches that could effectively replace the adhesive tact switch. I ended up purchasing 4 switches with comparable force for actuation and mechanical life specifications to the original switch. I then tested the clicking feel of each and picked the one that felt most similar in feel to the old button.

Prototyping

This process took a ton of prototyping. I wanted to make sure the button felt exactly how I wanted it to, and I printed a ton of different prototypes, messing with dimensions, mechanical features within the button, and foam specs. I also had my manager and other teammates test out the button feel for themselves to get feedback and direction. The image to the left shows a sample of the 3D printed parts I made to test my designs.

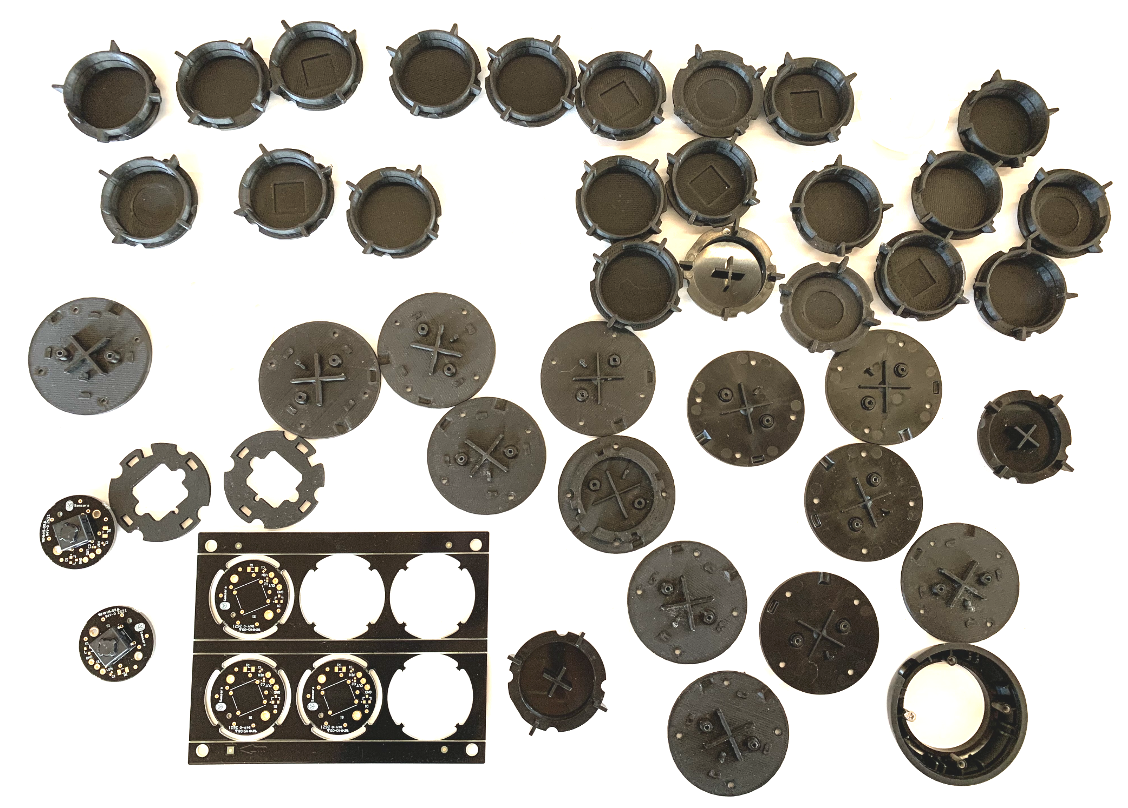
Design Iteration Sequence.

The image to the left shows the design iteration sequence I went through with the 3 modified parts of my button. The PCB redesign was simple: I simply coordinated with the electrical team to create solder holes for my selected through hole mount tact switch to mount into. The bottom enclosure piece (second row to the left) underwent a long series of changes. In short, ribs were thickened and the foam cutout was optimized for mass stamping production. Finally, the top enclosure was modified to interface with the bottom foam piece in order to create a dust proofing seal.

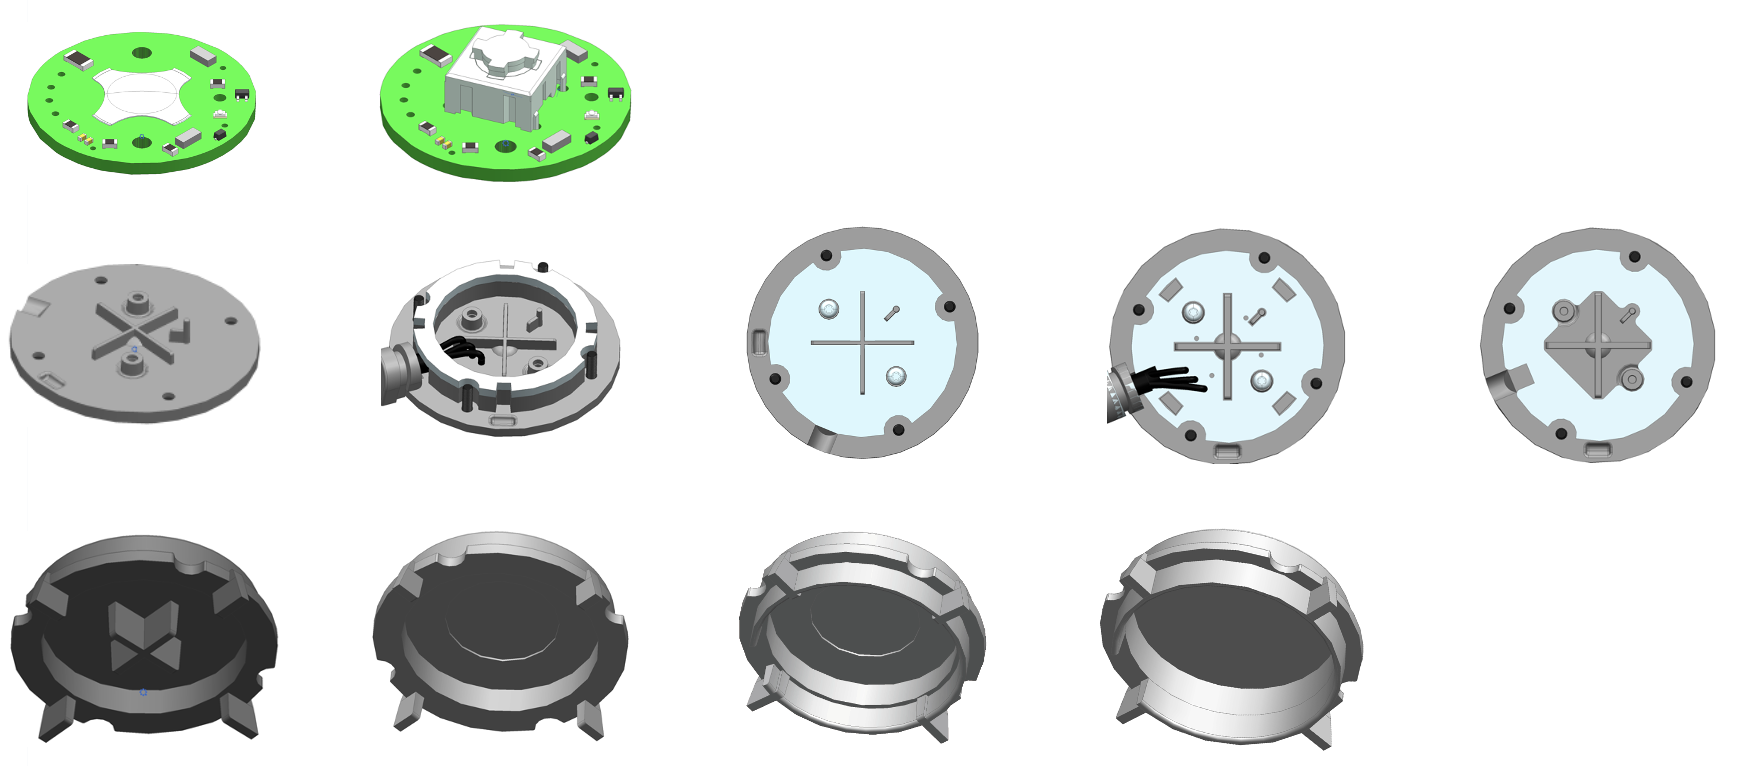
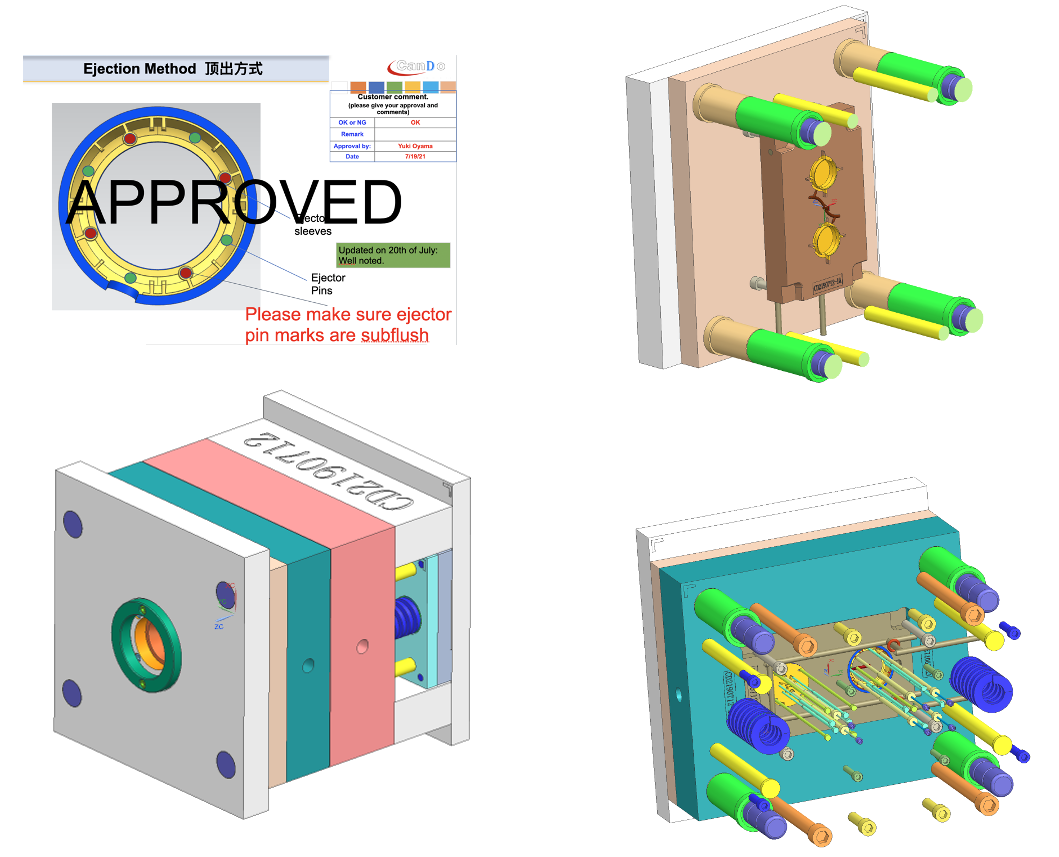
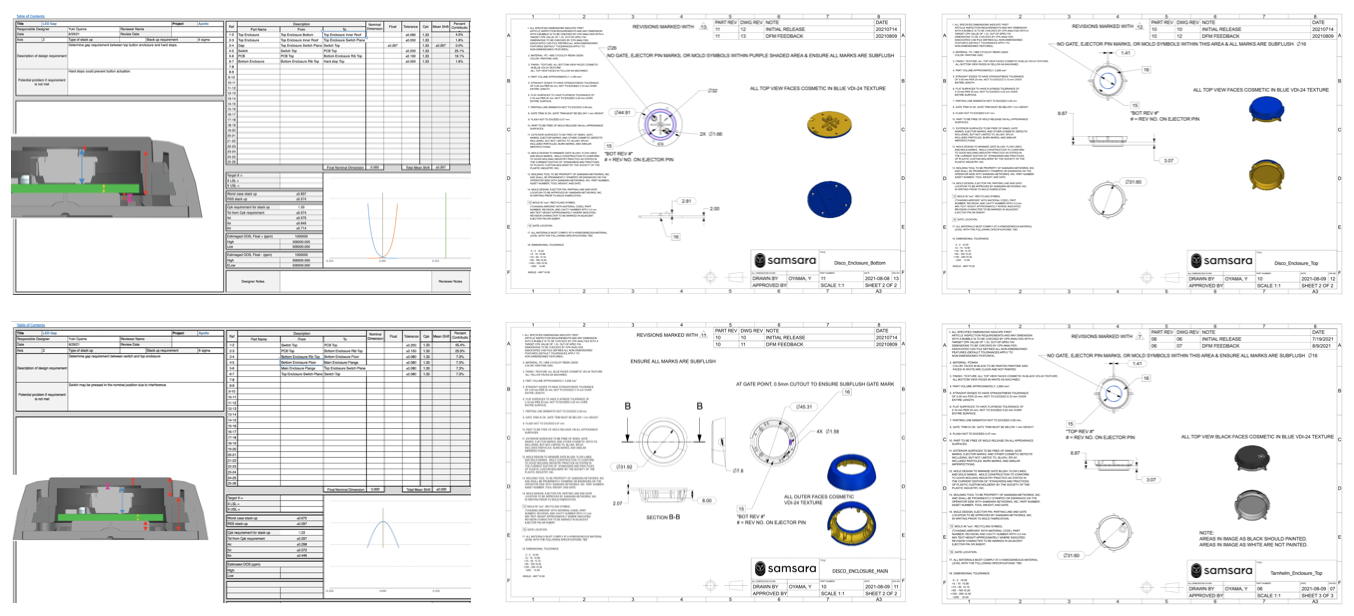
Tolerancing and 2D Drawings

Tolerancing was a huge part of this project, because I had to define critical dimensions in order to ensure the button feel would turn out right in MP. I created two tolerance stackups that allowed me to define CPK dimensions for the top and bottom enclosures. I included these dimensions in my 2D drawings that I sent out to the overseas manufacturer that was creating the injection molding tooling for my design.

Injection Molding

By the end of the summer, I received approval to kick off tooling for my redesign effort. I engaged in DFM with the overseas manufacturer, making minor draft angle changes and re-specifying gate and ejector pin locations. I was able to receive a CAD model for the tooling from the molder, which I have included in the image to the left. Overall, it was super cool to kick off a tool in my short summer at Samsara, and I enjoyed making a small but meaningful impact.